Custom Style
If you feel that the generated form style does not meet your personalized needs, you can modify the style by Custom Class configuration.
TIP
Custom style is implemented by style overlay. By adding class name definition, new style can be used to cover the original style, which can be flexibly implemented.
Form Style Customization
Form Property panel - Custom Class Fill in the custom style class name form-custom.

After the form is rendered, this class is added to the generated <form> tag

Define the form-custom style to realize the customization of the form style
.form-custom{
  padding: 10px;
  background: #eee;
  border: 1px solid #ccc;
}
View the effect

Field Style customization
Configure Custom Class : form-item-custom in the Field Property panel
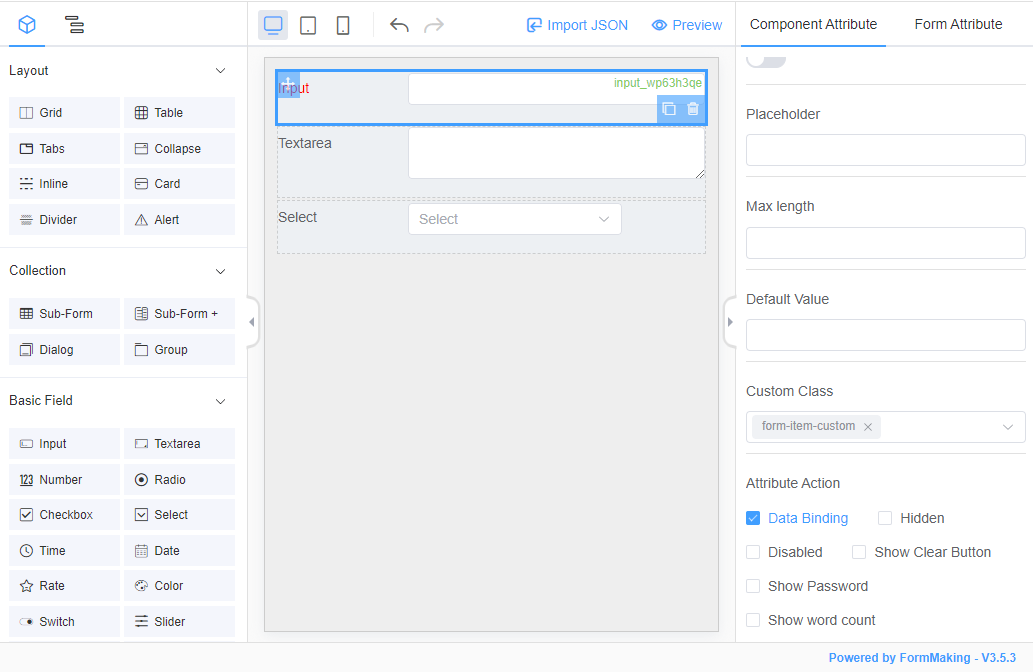
After the form is rendered, the form-item-custom class name on the binding will be placed in the following position.
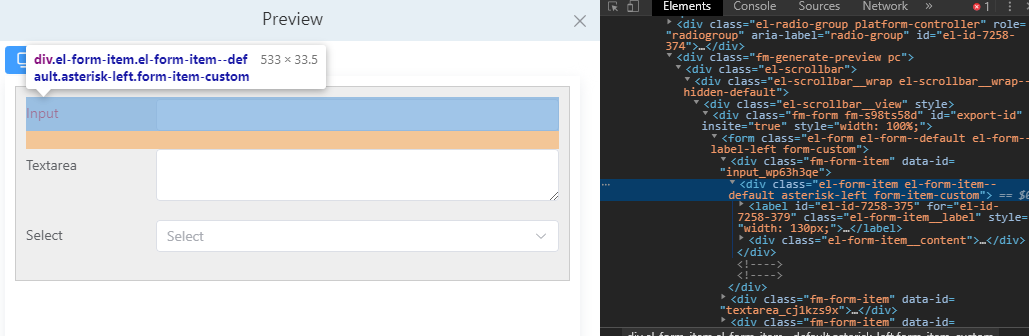
Now let's change the presentation of the single line of text to red.
.form-item-custom .el-form-item__label{
  color: red;
}
View the effect

Form Style Sheet
You can set some custom styles for the form globally.
Configure the Form Style Sheet
Open Form Style Sheet Settings in the** Form Property panel** to add style sheets.
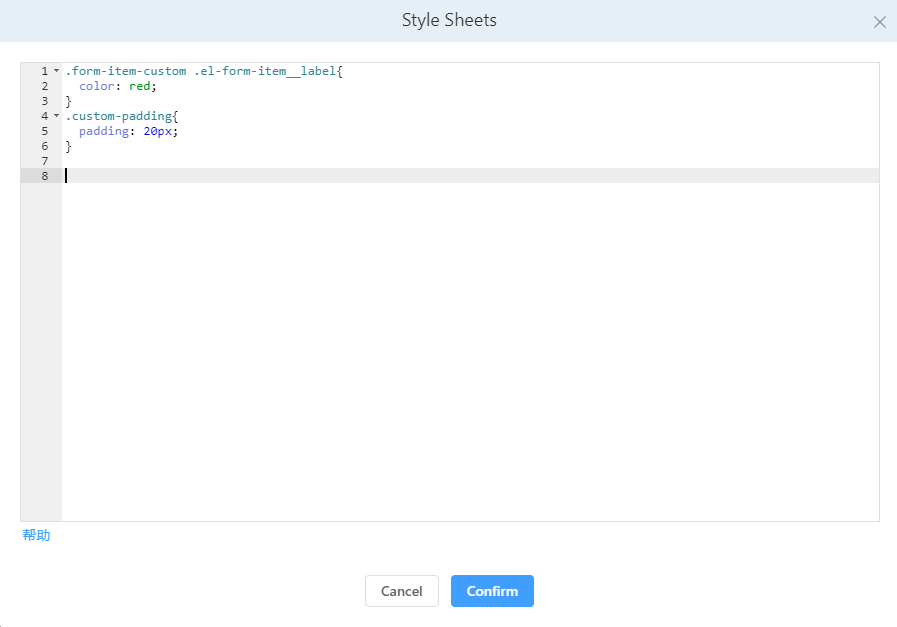
After adding the above styles, click Confirm.
Use Style Sheet styles
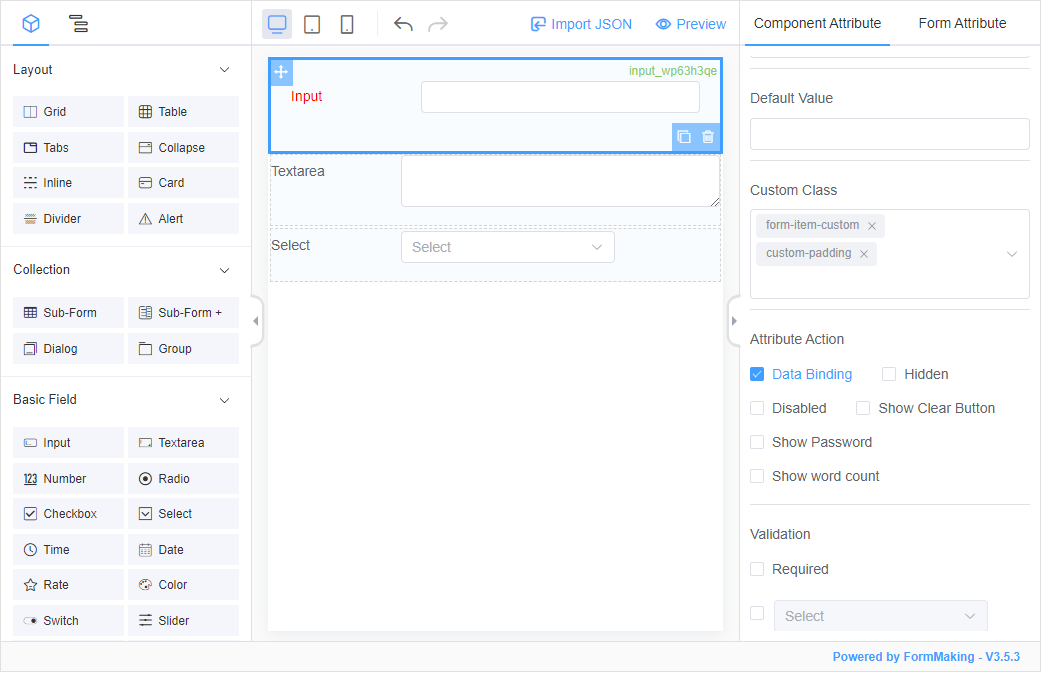
In the Custom Class, you can directly select the style sheet set above to use the configured style.
TIP
By default, the system will take out the class name configured in the form style sheet and select it for quick use.